
Lesson 1.8 Installing WordPress On Your Hosting Account
There are many ways to instal WordPress, for example you could use EasyApps, but I prefer you do it manually so that you get a feeling of what is going on. We have two options to perform manual installations, we can use an FTP client or Shell access. We are going to use the Filezilla software we downloaded and learned how to use. Here are the steps to get it done:
1. Create a MySQL database
2. Download wordPress
3. Edit the wp-config.php folder
4. Upload your wp folder
5. Run the instal script
1. Creating a MySQL database
In this step you will create your MySQl database and username for the for the installation. MySQL is an open-source relational database management system. What follows below in this step relates directly to ixWebHosting. For any other hosting company different from ixwebhosting, login to your account go the the cPanel or control center and look for anything leading you to MySQL .
Log in into your Hosting account and go to “Quick Product Jump Menu”, click on that. On the pop-up window click on “Manage”. You will be taken to the Control Panel.
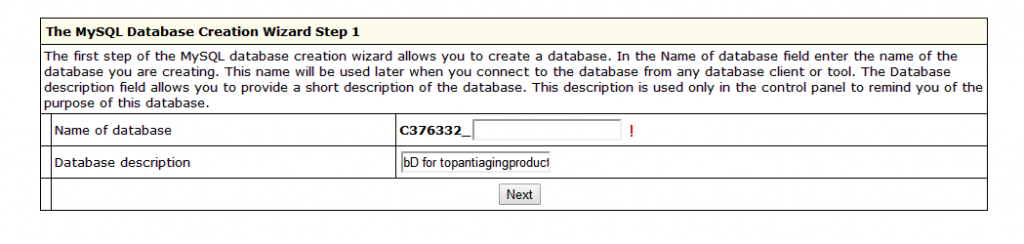
Click on “MySQL Server icon” under databases and you will be taken to a page where you will add a new database. Enter your first name in the box all in small caps right in the box after your username showed. So your database name will be username_john if your name was John. In the Database Description, put in “WordPress Database” or anything you like to describe your database and click on “Next”.
It should tell you at this stage that the database was created successfully. On the next page, you will add a new user to the database (You Only) in this case. You see, a database can have multiple users accessing it. In the first box on the left, put your first name simply. Then put a password of your choice (also write it down in Notepad so you have it later on when asked), write the password again in the next box and finally as User Role, select “dba”. This will give you full privileges and click “Add User” button, then the “Finish” button. You’re done with that!

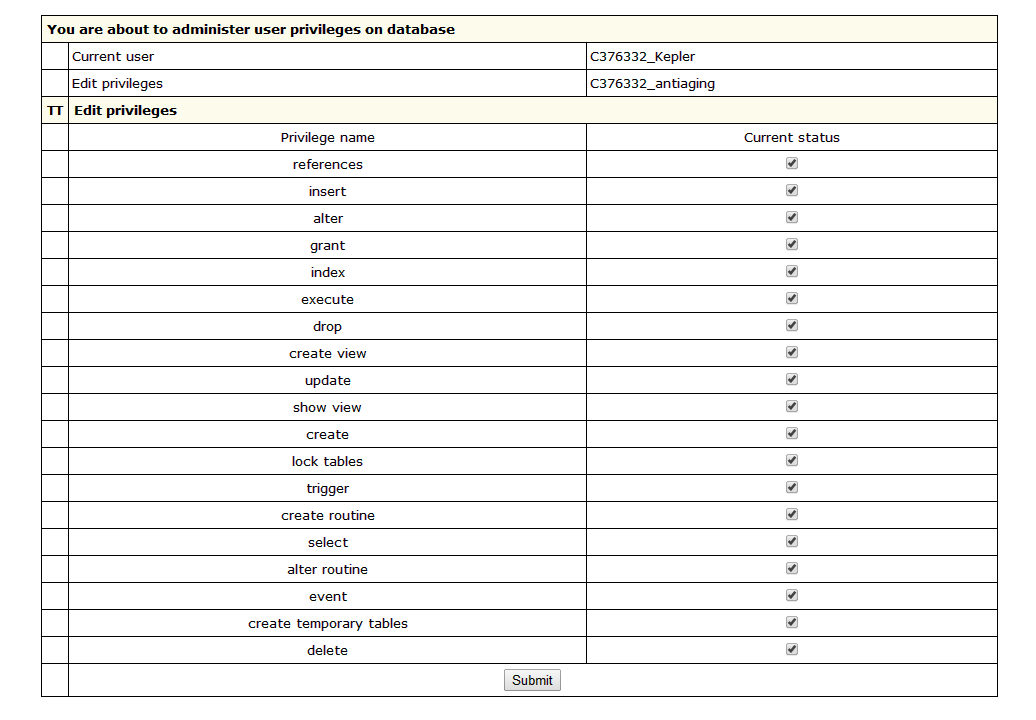
It’s a good idea to make sure that the MySQL has all the necessary privileges, so go back to the MySQL Server and locate “Database Users”. Click on “Edit” and a page with the assigned priviledges appears. Make sure that ALL have been checked. Click on “Submit”.
Ecxellent! Your MySQL database has been created!
2. Downloading WordPress
Download the latest release of WordPress from http://www.wordpress.org and use your favourite software to extract the files from the archive to a temporary folder on your computer.
3. Editing The wp-config.php File in the wordPress Folder
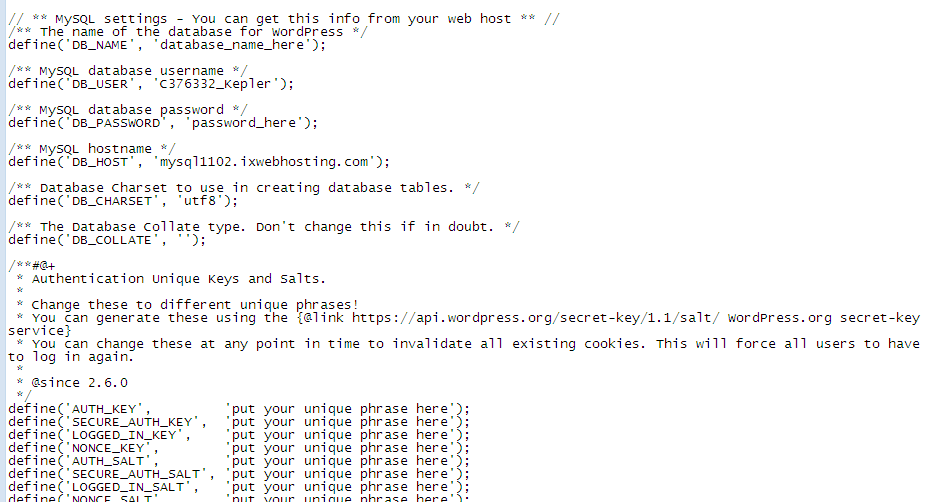
We need to edit the file called wp-config-sample.php and rename it to wp-config.php. So open up the file wp-config-sample.php file in a text editor and make changes as shown in the screenshot. When you have finished making the changes, make sure you rename the file to wp-config.php otherwise wordPress will tell you it doesn’t find the wp-config.php file.
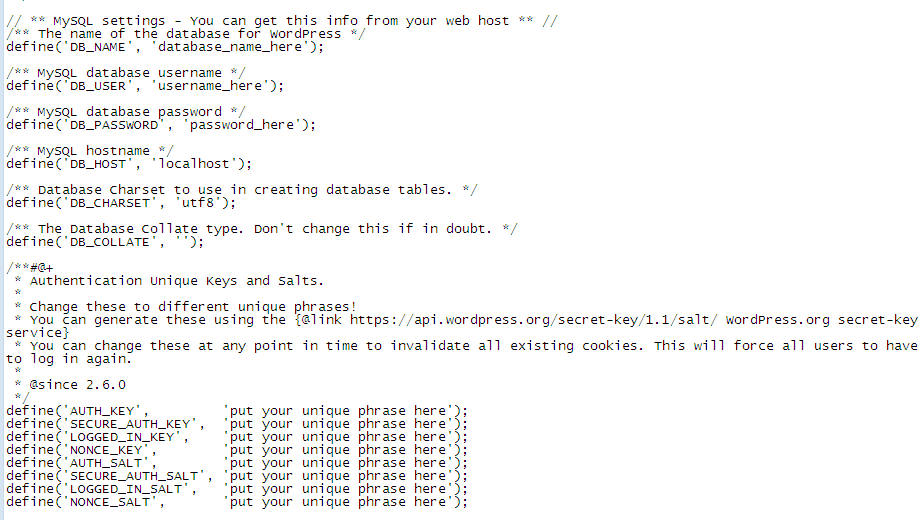 Change data fields to as below, the fields to be changed are the DB_NAME, DB_USER, DB_PASSWORD and DB_HOST. As example I filled only two, change all four of them. For ixwebHosting get the host name from the MySQL database page, for other hosts consult your host if you can’t find it yourself.
 4. Upload Your WordPress Files.
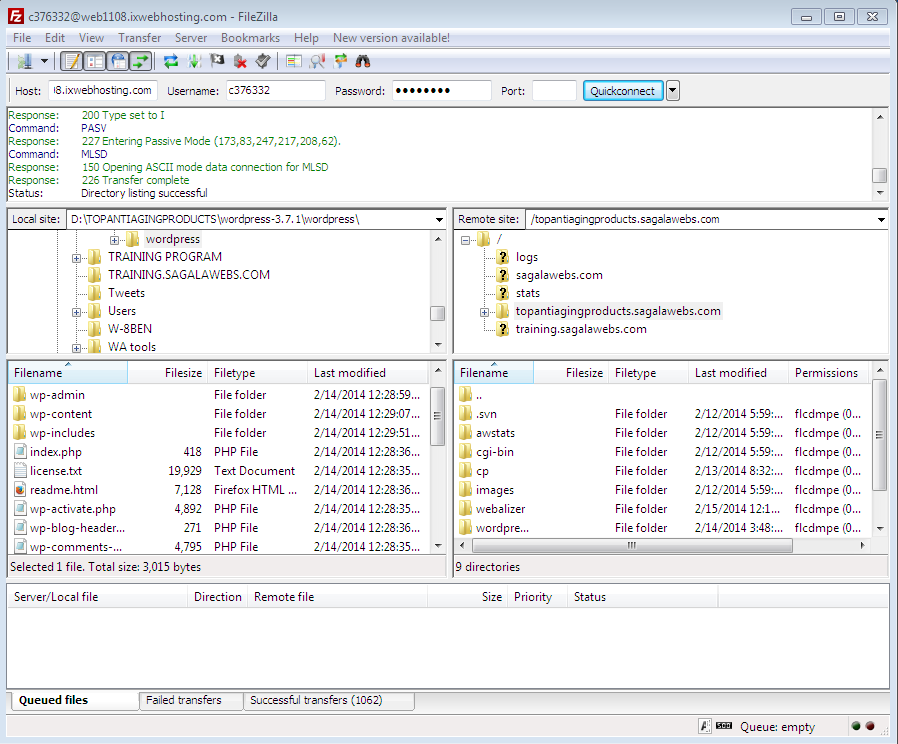
Log in to Filezilla and in the case of ixwebhosting double click on the directory you want to load wordPress to. If you desire wordPress to be on the homepage of your site, you will need to upload wordPress in the root folder. Open your wordPress folder and upload each file to your host, don’t upolad the complete folder. Next delete the “index.html” file from the list of files you find on the root directory.
5. Run Install script
Go to your web browser and visit your new wordPress site at http://yourdomain.com/wp-admin/install.php if your uploaded your wp into your root folder otherwise write http://yourdomain.com/folder-name/wp-admin/install.php. where folder-name is the name of the folder into which your uploaded your wordPress. If everything went well, you will be greeted by the wordPress setup page, fill in the information and click on “Install wordPress”. Use your url to go to your site. Voila! You successfully installed your wordPress!
Todays Task: Instal wordPress on your ixwebhosting account. Be careful especially when you are on the host side of your Filezilla not to delete anything you are not sure of, only the index.html file is to be deleted. If you get stuck, go back to the Forum for help or email me.
Cheers.
Related Topics
Filezilla And Trellian Webpage Software