
Have you ever heard the adage – an Image says a thousand words? Yes. it’s very true that an image has a strong effect in making the information sink into your reader’s mind. An image after a piece of content helps your reader to have some reflection. Not every image will do that though, it has to relate to the content. It is, therefore, imperative to know where to get your images and the process of uploading images to a wordPress website.
In this tutorial I will try just to do that, i.e. help you how to find images and how to best add them to your wordpress website content. Two sources of images are there, the free and paid image sources. I will spend all my time on how to get free images.
You can get your images from:
1. Free image websites.
I get free images from wikimedia commons but you can find for yourself other website which offer free images, there are plenty of them. If you don’t know how to upload an image to your computer, this is how: Point your cursor to the image and then right click. Click on “save image as…” and select a location where you want the image to be stored on your computer.
2. Stock exchange websites.
3. Taking them yourself.
Do you have a smartphone? Then why not take images of you want use yourself? If, for example, you wanted to write about a recipe you know. You could take images of all the stages you wanted to show with your smartphone and use them on your page.
4. screenshots.
Screenshots and snapshots are best when you want to explain a certain process and they allow to add annotations. Use your snipping tool (Win 7) to create your screenshots or snapshots. There are many other tools for this purpose, some of them for free. You can download tools from droplr.com, snagit, Snipping Tool ++. I personally use Lightshot which is a free tool.
How Do You Add Images To A WordPress Website?
When you have written your content, adding images is a very simple process. You can add your image to the left, right or in the middle of your content.
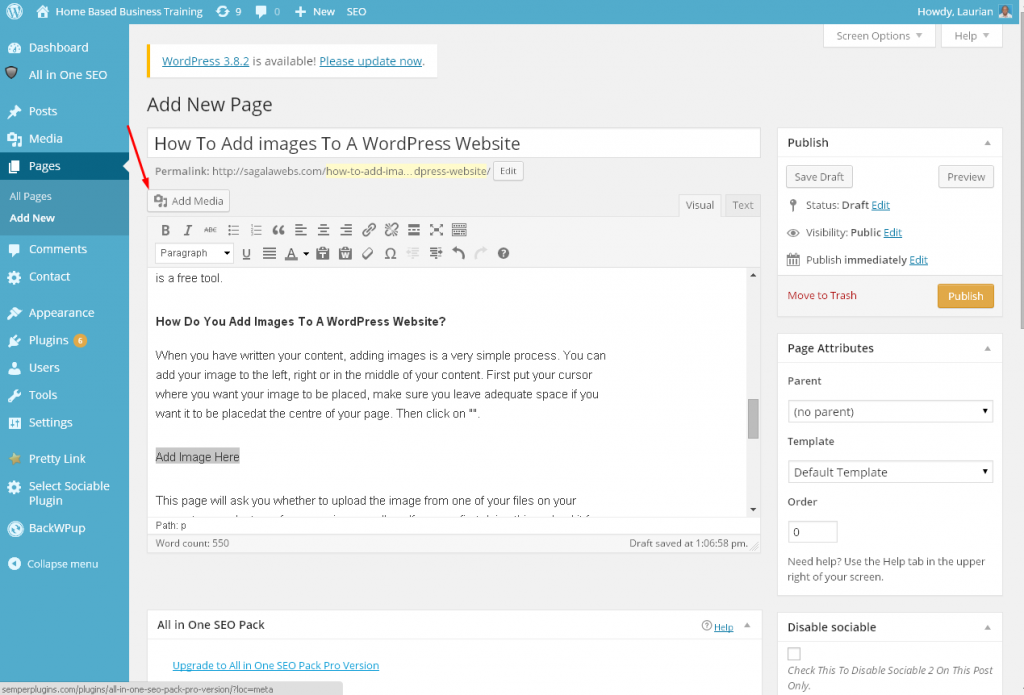
First put your cursor where you want your image to be placed, make sure you leave adequate space if you want it to be placed at the centre of your page. Then click on ” Add Media”.
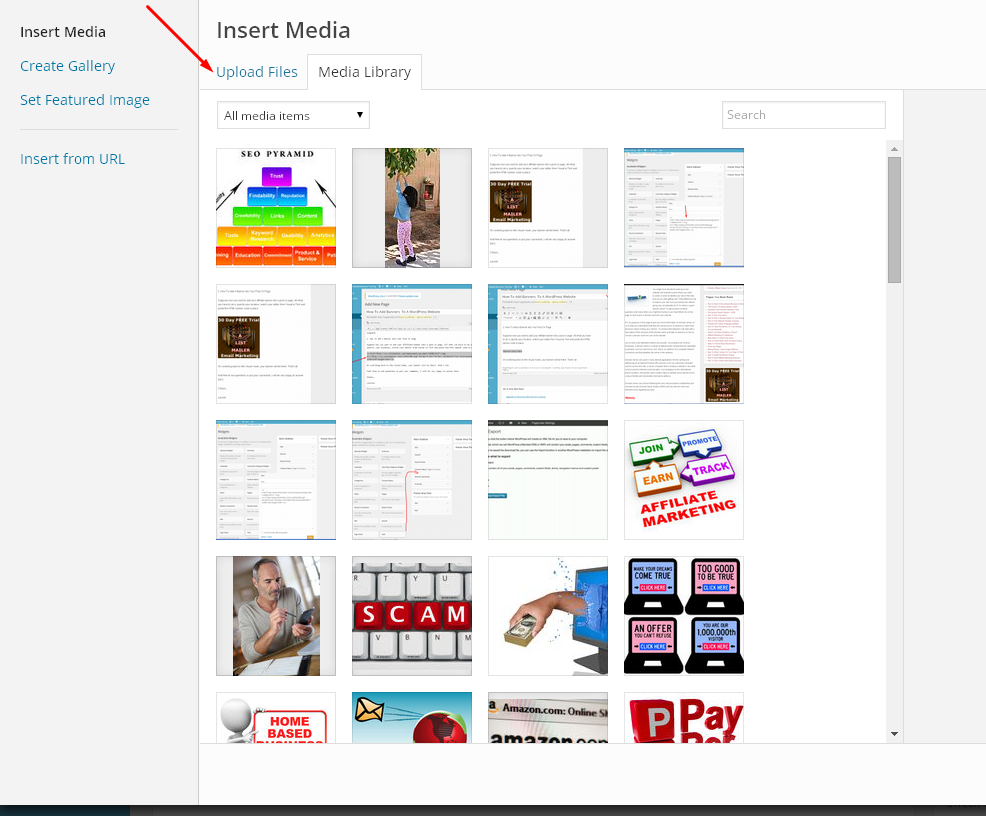
This page will ask you whether to upload the image from one of your files on your computer or select one from your image gallery. If you are first doing this, upload it from a location you serve your images on the computer. So click on “Upload Files”. You’re seeing images here but your page may be empty.
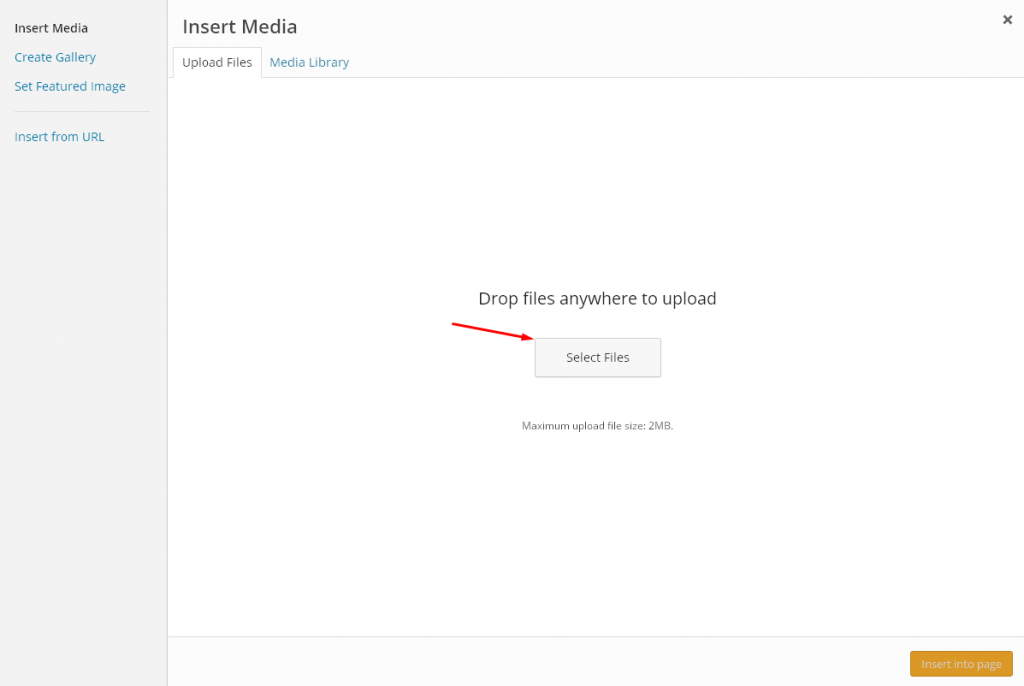
You will be taken to a page to instruct the selection of files. Click on “Select Files”.
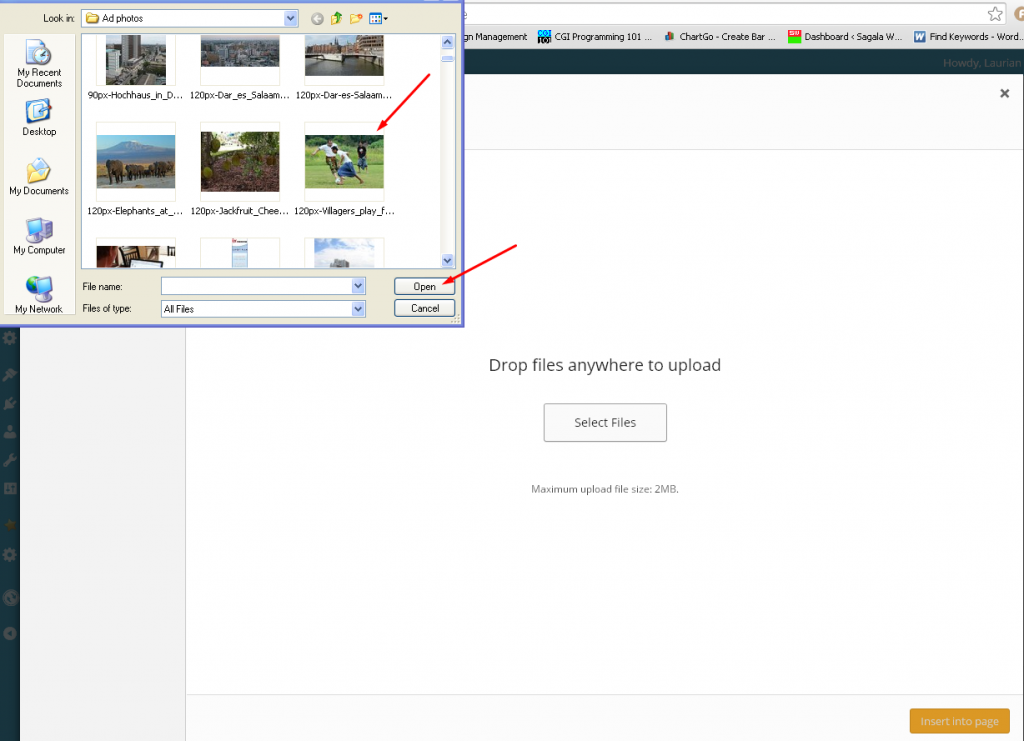
On the page that follows select the image from the file location using the window at the top, click on the image and then on “Open”.
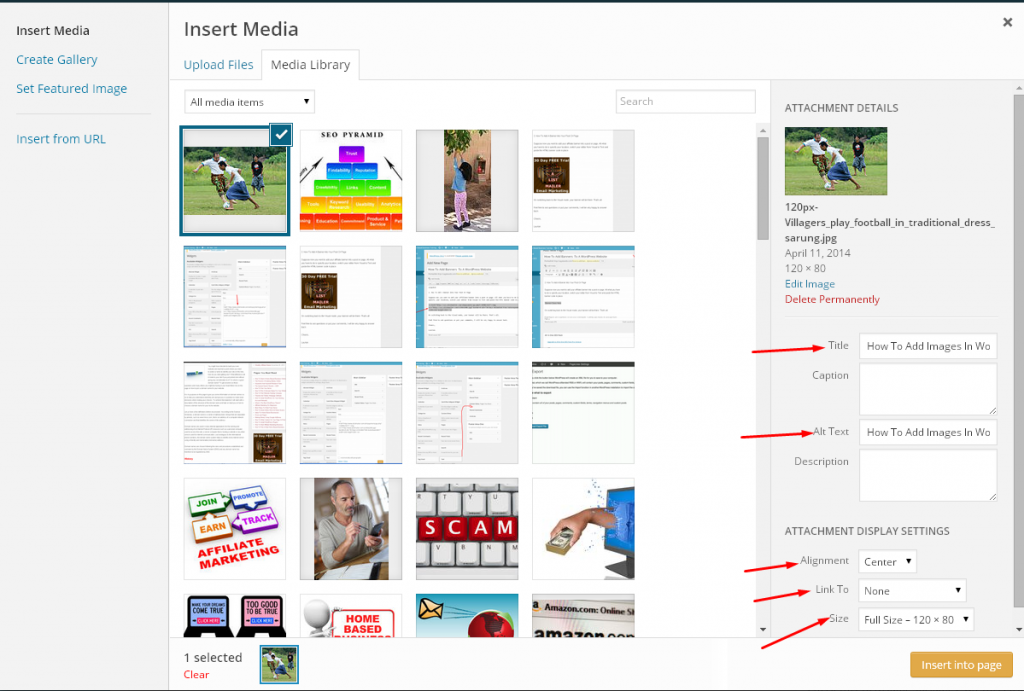
Write the title for the image. Use relevant keywords here as the title helps in your SEO. Rewrite the title in Alt Text. Select where you want the image be placed on the drop down menu, select your link option and finally the size of your image. Click on “Insert into page”.

When you have the image on your page or post, you can delete the image if you don’t want it or resize it by clicking on it and choosing the appropriate button for your editing.
Feel free to add questions or comments on the above tutorial, I will be more than happy to answer back.
Cheers,
Laurian.
Related Topics
How To Add Banners To A WordPress Website
How To Add Videos To A WordPress Website